| |
 |
| | | |
| |
Introduction |
|
| | | |
| |
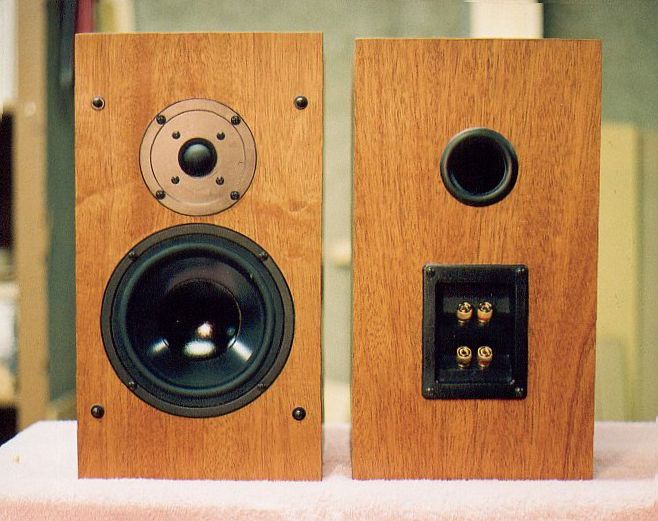
The speakers are a pair of two-way bookshelfs known in the internet DIY speaker world as "AR.COMs". They were designed by Ed Frias, a world-class, very high-end speaker builder as a gift to the DIY community. I built them from the detailed assembly instructions that used to be posted at the AudioReview web site, but appears to be gone now, and from exact cabinet specifications that you can find by searching the DIY Speaker Forum (search for "ar.com diy speaker"). |
|
| | | |
| |
I still use the first set of these speakers (or rather, my son uses them). They sound just as good as the second set, but they are not set up for bi-wiring or bi-amping. They also have a different shape and finish.
|
|
| | | |
| |
 |
| | | |
| |
The speakers contain a 6-1/2" woofer and a 2-1/2" tweeter, and are ported in the rear. Four-way binding posts are used to allow for biamping. The crossover is a standard 2-way, second-order Butterfield (?) filter, and uses very high-quality components.
|
|
| | | |
| |
Cabinet Construction |
|
| | | |
| |
 |
| | | |
| |
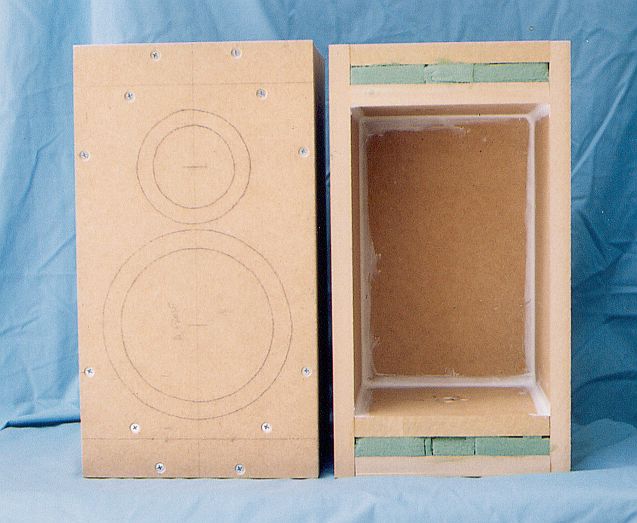
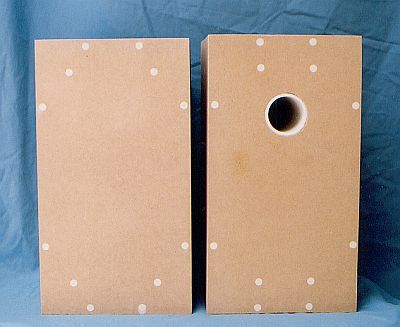
The cabinets are made with 3/4" MDF. All of the cabinet work was done with a hand-held circular saw, a hand-held power saber saw, and a hand-held power drill, with the use of several custom, hand-made jigs. The panels are glued together and held with countersunk screws. |
|
| | | |
| |
I made the cabinets 3" taller than the standard 13" height so that some finished wood shows above and below the grill cloth. I kept the internal volume the same by putting in two internal MDF dividers. To minimize any acoustic effects from the extra space created by the dividers, I filled the spaces with glued-in foam blocks (the green foam stuff you use to hold artificial flowers in arrangements). I also put 2" square MDF blocks in the center between the dividers and the tops/bottoms to add support. The white material along the inside edges is painters caulk to make the boxes air-tight. |
|
| | | |
| |
 |
| | | |
| |
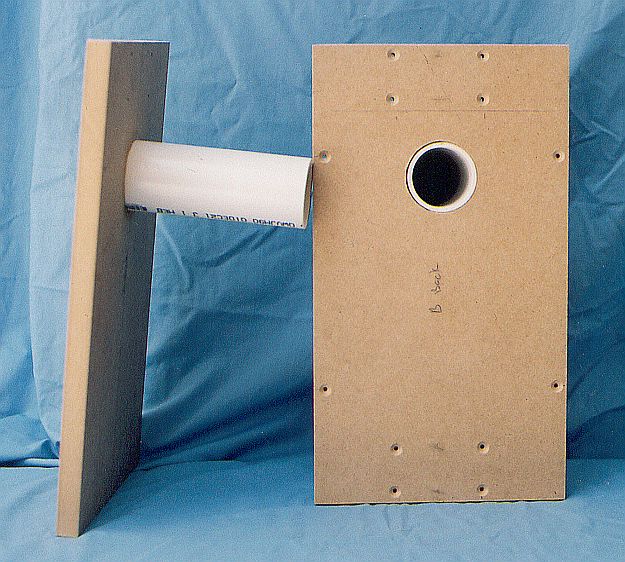
The ports are made from 2" schedule 40 PVC. The PVC is glued into holes in the back panel and sanded flush with the outside surface. The ports extend 6" from the inside of the back panel into the cabinet behind the tweeter. |
|
| | | |
| |
 |
| | | |
| |
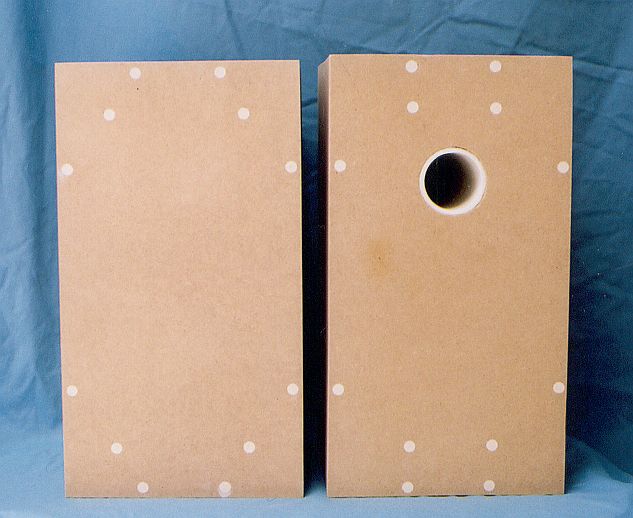
The screw holes were covered with wood putty and the cabinets sanded flat and smooth with 150 grit sandpaper in preparation for veneering. |
|
| | | |
| |
Veneering |
|
| | | |
| |
The cabinets are covered with mahogany veneer. I describe the process in detail here. |
|
| | | |
| |
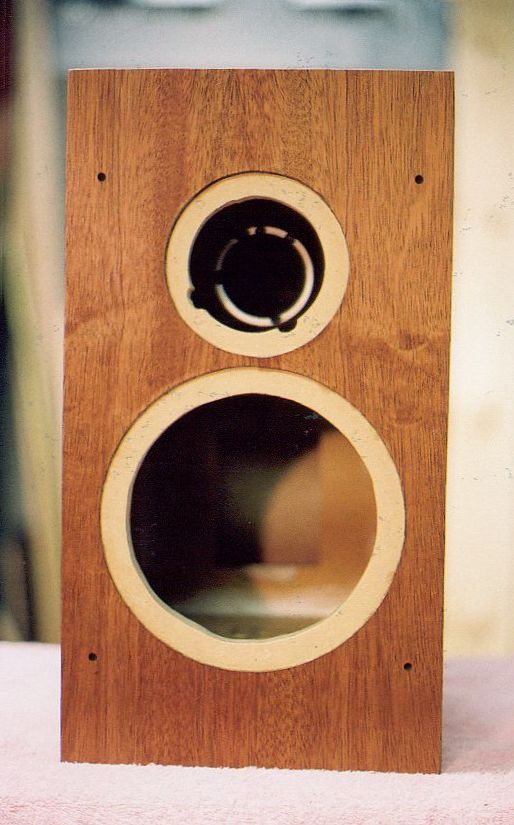
Driver Cutouts |
|
| | | |
| |
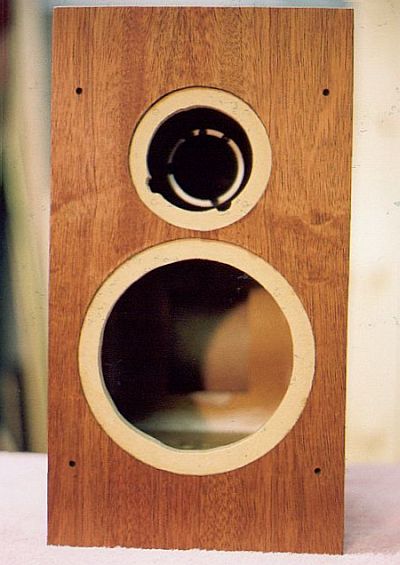
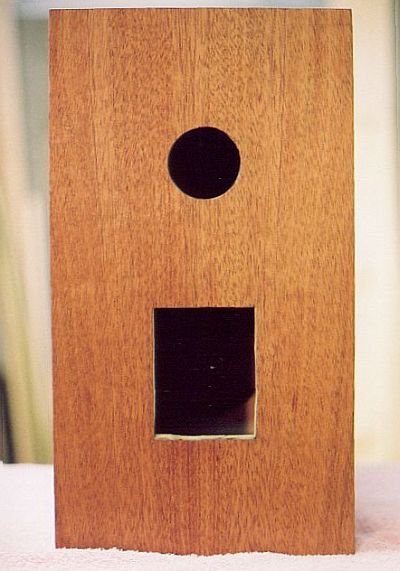
The driver recesses were cut with a router after the veneer was put on, as shown in the photo below. I used a home-made "Jasper"-style jig that I fashioned from a piece of plexiglass. The speaker holes were cut freehand with a saber saw after the recesses were cut. |
|
| | | |
| |
 |
| | | |
| |
The holes for the rear binding post assemblies were cut at the same time. The binding post assemblies have four posts, a set for each driver, to accommodate biamping. The posts can be connected together with gold-plated connectors when using the internal passive crossover. |
|
| | | |
| |
 |
| | | |
| |
Finishing |
|
| | | |
| |
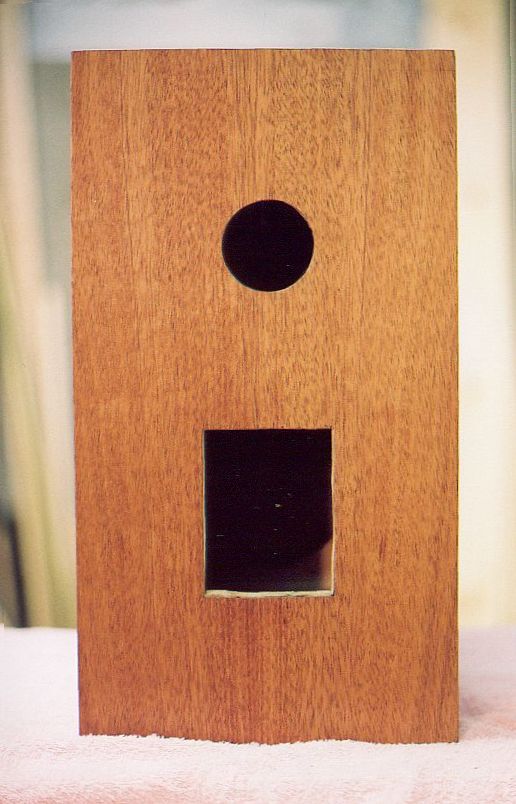
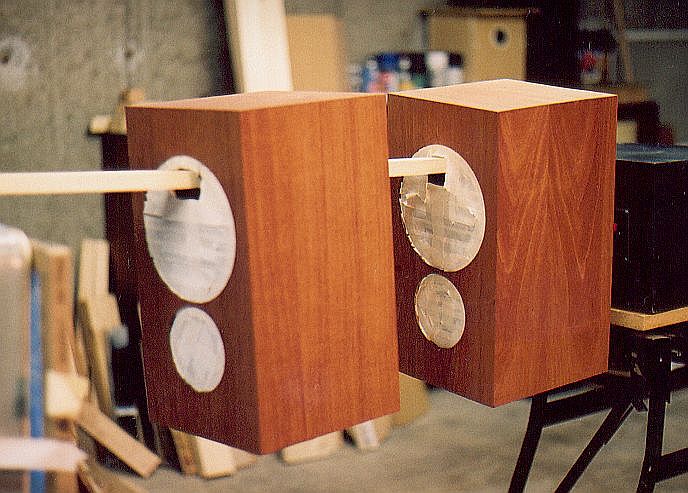
I started off by sanding down the cabinets very lightly with 220 grit. After cleaning off all sawdust, and cleaning out the insides, I taped up the driver cutouts and ran a stick through them to suspend the cabinets off the ground and have all sides exposed, as shown in the photos below. |
|
| | | |
| |
 |
| | | |
| |
To finish, I used three coats of Watco Danish Oil. The first coat was allowed to soak in for an hour, with constant re-applying, then lightly wiped off. After drying for 48 hours, they were rubbed down lightly with 0000 steel wool. I don't like using steel wool because of the mess it makes, but I haven't been able to find anything else that works as well. |
|
| | | |
| |
The second and third coats were left on for about 20 minutes, and given about 24 hours to dry, with steel woolling after each. After the final steel-woolling, I buffed the finish with a soft cloth. I haven't (yet) applied any paste wax, and I don't think I will. I waited an additional 24 hours for the oil to dry completely before assembling the speakers. |
|
| | | |
| |
Final Assembly |
|
| | | |
| |
After the oil dried, I drilled the holes for the plastic male grill snaps and glued them in. I then attached the crossovers to the inside bottoms of each speaker, attached the rear binding post assemblies and hooked them up to the crossovers, and glued on the port trim rings. I marked and drilled the holes for the drivers, and connected the driver wires to the crossovers. |
|
| | | |
| |
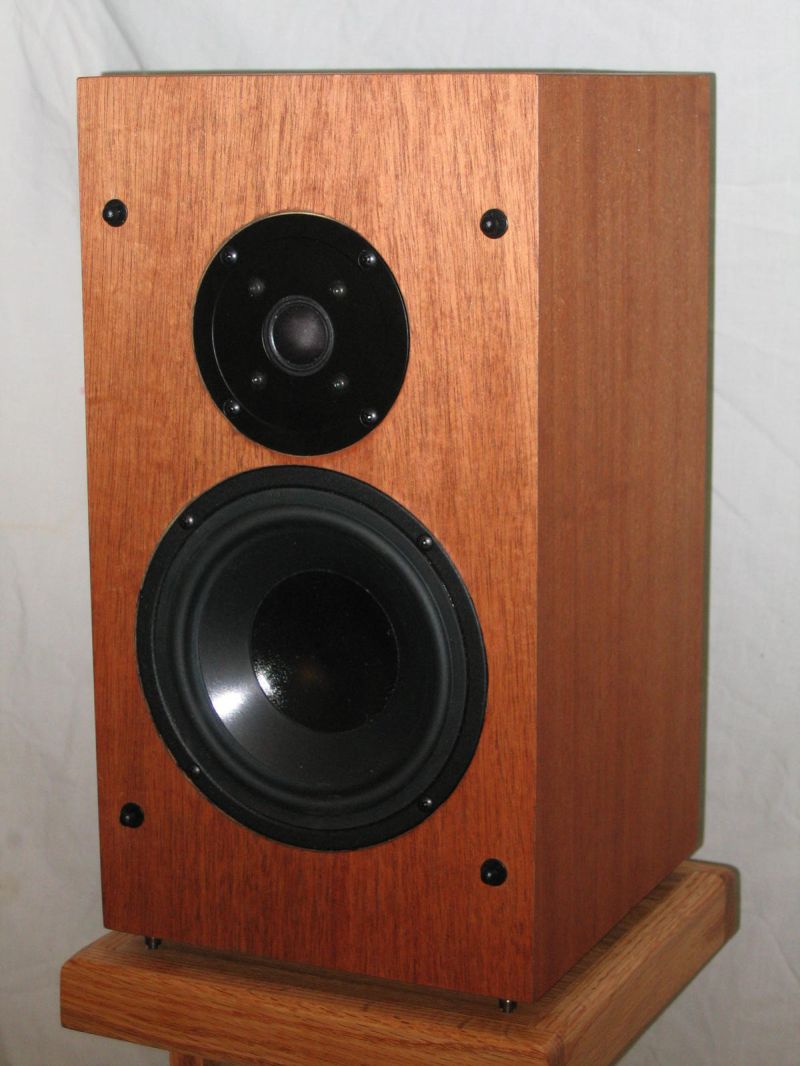
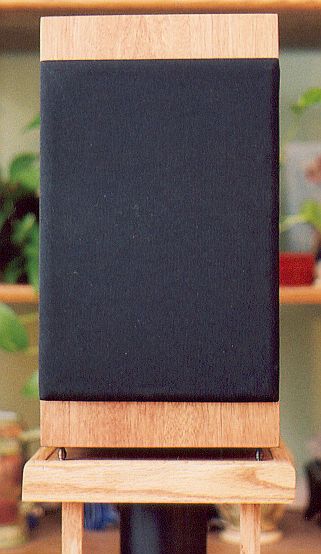
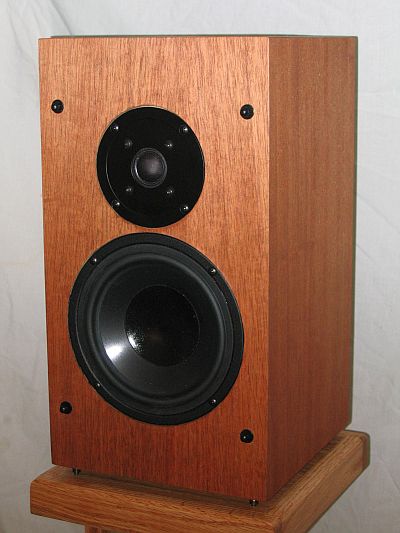
At this point, I added the polyester stuffing. As per the AR.COM instructions, I filled the cabinets half-full with loose material. I then attached the wires to the drivers and screwed them in. A finished speaker is shown below. |
|
| | | |
| |
After experimenting with the first pair of these speakers that I built, I found that they sounded best with a 2 ohm, 10 watt resistor in the (+) lead to the tweeter, as recomended by Ed Frias in his many posts in the DIY Speaker Forum (search for "ar.com diy speaker"). After listening to this second pair, I found that 4 ohms toned down the highs to my liking. Then, after I further modified the CD player as described here, I had to add another 2 ohms (6 total) to again tone down the highs. I may need to add more because some recordings sound a bit shrill at higher volumes. |
|
| | | |
| |
 |
| | | |
| |
Grills |
|
| | | |
| |
The grill cloths are mounted with staples on 1/2" chipboard frames. The frames are attached to the speaker baffles with little plastic grill snaps from Meniscus Audio. I describe the process in detail here. When I really want to listen, I remove the grills; the music sounds better without them. |
|
| | | |
| |
Conclusion |
|
| | | |
| |
So, how do they sound? They sound about the same as the first pair I built; in other words, absolutely fantastic! But that is what I expected. I built these to have better looking cabinets, and I think I succeeded. The mahogany finish is beautiful. |
|
| | | |
| | | |
| |  | |
| | | |
| | | |