| Introduction | ||
| After I decied to try veneering the cabinets for the second set of speakers (described here), I searched the web for instructions, tips, and tricks on how to veneer speaker cabinets. What I found was an enormous amount of information, warnings, conflicting advice, and message board posts about how to do it and how not to do it. After sifting through everything I could find, I settled on the following method. | ||
| The method worked very well for me; it didn't require a lot work, special skill, tools, or materials, and it produced outstanding results. Granted, I veneered a relatively small set of cabinets, so maybe any method would have worked fine, and maybe this method wouldn't work so well for larger jobs - but, hey, it worked great for me. | ||
Basically, the method I settled on uses yellow wood glue, an iron, and a utility knife. The upshot of the method is as follows:
|
||
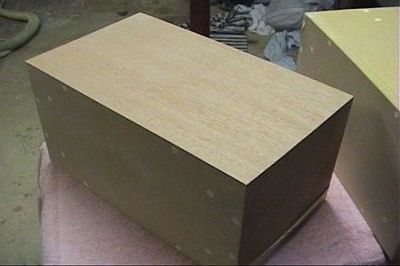
| Another thing I did was to use a small piece of scrap cabinet material, and veneer, and I used them to practice each step as I went along. I avoided several mistakes that way, and it allowed me to do an overall better job. After I had finished veneering, I cut them into several pieces and used them to test different finishes. | ||
| For veneer, I used a large (24" x 96") sheet of pre-spliced, 10-mil, flexible, paper-backed material from Constantines. Specifically, I used flat-cut mahogany. For glue, I used TiteBond II yellow wood glue, diluted with 10% water. | ||
| Preparing the Cabinets (the "substrate") | ||
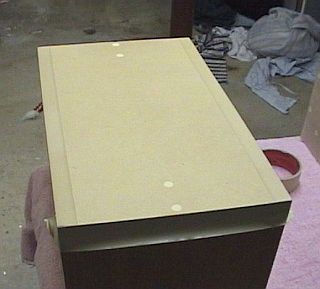
| The cabinet surfaces must be sanded smooth and flat. Any irregularities can be felt (and seen) through the veneer. Be especially careful with butt-edge joints, because they are never flat, and the differential hardness makes it difficult to sand them flat. Be sure all screws, gaps, irregular spots, etc., are filled with wood putty and sanded. I used a belt sander, which worked well, but is dangerous because the slightest slip can do some seriously damage. | ||
| When finished making all sides flat, rough up the surfaces with 100 grit sandpaper so the glue will adhere better. Wipe all surfaces with a dry cloth to remove sawdust. I don't use tack cloth to clean surfaces because it leaves a sticky residue. I also don't use a damp cloth because the moisture causes the grain to rise. | ||
| Preparing the Veneer | ||
| Map out which parts of the veneer is going to go where. Be careful about grain direction; sides, front and back should go up and down, and the top and bottom should go side to side to match with the side pieces at the corners. It looks best if the two sides and the top are cut from one single strip so the grain pattern is continuous. The most looked-at surfaces (in order) are the front, top, and sides, so use the prettiest pieces there. | ||
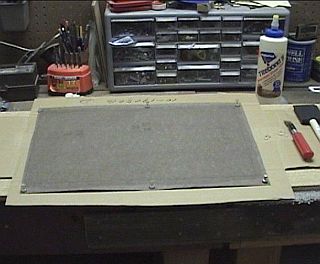
| Slide a flat, solid cutting surface under the veneer, and using a sharp utility knife with a new blade, cut each piece with a 1/2" to 1" margin around all sides. Don't be tempted to skimp on this - I thought I could, but I quickly learned why you need this margin. For one thing, you must coat the veneer back with glue that goes beyond the actual cabinet edge, but not to the edge of the veneer or it will damage the nice wood side. You need the margin to tack the piece of veneer down so it lays flat. Also, you need the excess for general handling. The place to scrimp on margins is the top edge of the two sides and the side-edges of the top, for the reason described above. | ||
| Lay each piece in turn on a soft cloth or carpet face-down and lay the cabinet surface on it, get it centered, and trace the cabinet on the back of the veneer with a pencil. Label the piece as to which cabinet surface it goes on, and which way is up, down, front, back, etc. | ||
| Applying the Glue | ||
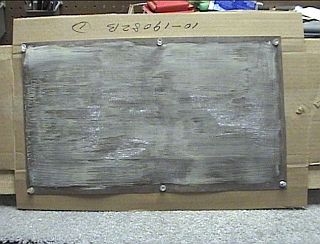
| Lay a piece of veneer face down on a piece of cardboard on a piece of wood. Tack the four corners down with push-pins or something like them. The cardboard is not enough - I had to hammer the pins into the wood to get them to stay. Keep the pins as far toward the edges as possible so they don't get in the way when applying the glue. | ||
| I applied the glue with foam brushes. The trick is not to put on too much. Don't pour it on and spread it around. Apply a coat with the brush, then smooth the glue with long strokes as you would with paint. Make sure the glue goes about 1/4" beyond the pencil lines that mark the cabinet edges; especially be careful that the corners are well covered. | ||
| Do the same on the cabinet surface. Don't put too much glue on! But, be careful to be sure that there is glue right up to the very edge of the edges, and especially the corners. Edges and corners are everything in veneering! | ||
| The photos below show wet glue on the veneer back and the cabinet. | ||
  |
||
| If you are applying glue to a cabinet surface that has an adjacent side that has already been veneered, you MUST use masking tape to protect the veneer along the edge (see photo below). Be careful when applying glue on these edges, you don't want any to get between the tape and the veneer, but you must still get a good coating right up to the edge. | ||
 |
||
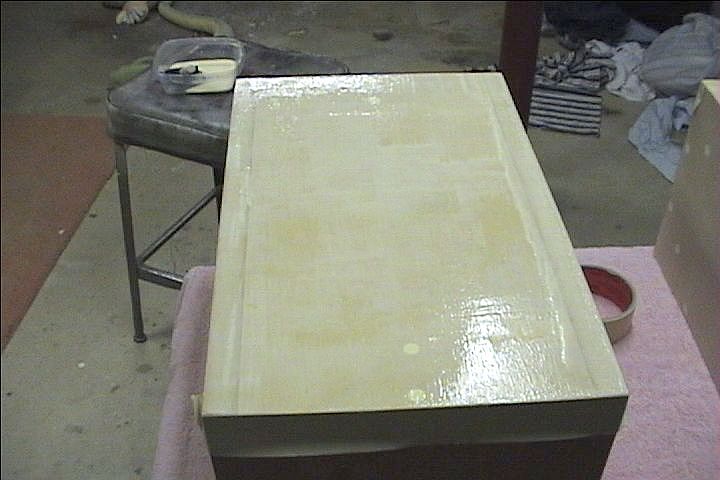
| Allow both surfaces to dry (1 to 3 hours). The glue goes from milky whitish-yellow and sticky (as shown in the photos above), to translucent amber-colored and hard, like old, yellow varnish (as shown in the photos below). I applied two coats to both surfaces. Some people say the MDF cabinet surfaces need three coats, but I didn't find that to be true. After the final coat is dry, remove any masking tape slowly by peeling it off up toward the edge. | ||
  |
||
| Attaching the Veneer | ||
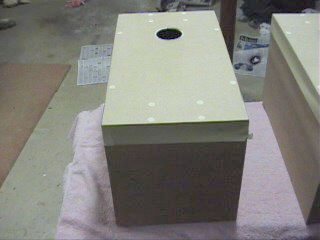
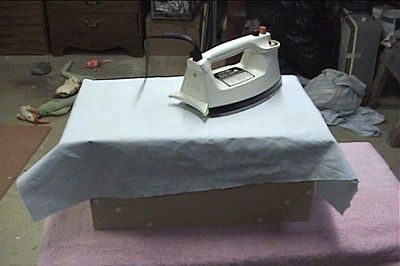
| Turn on your iron and set it to "Cotton". After it is warmed up, place the veneer on the cabinet and put a small, soft cloth on top of the veneer. Use the pencil lines to align the veneer just right, then hold it down tight while picking up the iron. Place the iron on the cloth and push down reasonably hard while moving the iron around in small circles for about 30 seconds. This anchors the veneer to the cabinet so it won't move. | ||
 |
||
| Next, remove the iron and the cloth and replace it with a cloth that covers all, or much, of the cabinet surface. Put the iron back in the middle and slowly move the iron in circles working your way from the center to the edges. I pressed fairly hard, but not enough to strain. I would spend about 3 to 5 minutes on a 16" x 10" surface. Don't worry about burning the wood; if you use a cloth and keep it slowly moving, you will be OK. | ||
 |
||
| The most important part are the edges and corners. Slowly run the iron over the edges with the iron half way off the box so the center of the iron is over the actual edge or corner. I also tilted the iron over the edge from time to time to fully anchor the very outermost part of the edge. | ||
| When finished, remove the cloth and inspect. "Flick" your finger over the surface and listen - if the bond is good, it makes a thunk noise that sounds like solid wood. If it makes a ticking or hollow noise, slap the iron to it again for 20 seconds or so. Go around the edges and carefully test if they are solid. If you find the slightest gap between cabinet and veneer, slap the iron to it again (with the cloth). Allow the veneer to cool and set for 24 hours before trimming. | ||
 |
||
| Trimming the Edges | ||
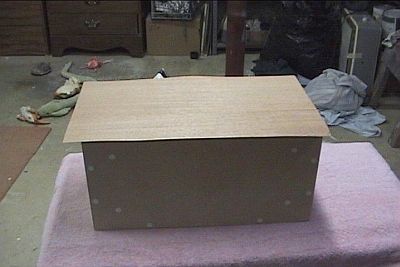
| Lay the cabinet with the newly veneered side down on a hard cutting surface. Use the utility knife (with a new blade!) and lightly and slowly cut about 1/32" to 1/16" out from the edge of the cabinet. DON'T cut all the way through on the first pass! If you do, you will splinter the wood when cutting across the grain and if you are cutting with the grain, the blade will follow the grain, possibly into the cabinet edge, thereby wrecking your nice job. Make several passes to eventually cut all the way through. | ||
 |
||
| When trimming adjacent to an already-veneered side be careful not to run the knife along the veneer. It is tempting because it acts like a guide and allows you to better control the knife, but the side of the knife leaves a scratch in the veneer and it is tough to fix. | ||
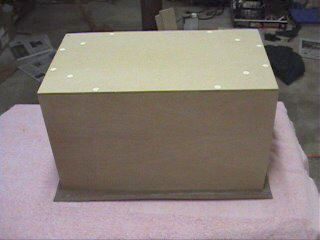
| Once all four edges are trimmed, stand the cabinet up. Use 220 grit sandpaper and a sanding block to sand the edges flush. ALWAYS sand down from the top to bottom so you don't splinter the wood. DON'T go up and down like a saw. Keep the sanding block at right angles to the new veneer side, and always sand with the grain of the adjacent veneer side so you don't scratch it all up. | ||
 |
||
| Be careful handling the cabinets as you add the veneer pieces. It is easy to catch the edges on your fingers and splinter the wood. When all sides of the cabinet are veneered, lightly sand each edge at 45 degrees to make them smooth. Lastly, lightly round off the corners so nobody gets hurt. | ||
| Finishing | ||
| First, I lightly sanded the cabinets. WARNING: 10-mil veneer is very thin, so don't try sanding with anything coarser than 220 grit, and use that very lightly and sparingly. Practice on the test scrap, if you made one, or use a piece of trimmed veneer scrap to see how much sanding you can get away with before you go through the wood and into the backing material. | ||
I cut my test scrap piece into three pieces and experimented with the following three finishes:
|
||
Back